|
|
Home →
Survival →
Containers →
Baskets
Red Osier Dogwood Baskets
|
|
Red Osier Dogwood grows in wet areas. It can be identified by its shiny
red bark. Its stems are very flexible.
For more info on how to identify this shrub, please visit the
Ontario Trees & Shrubs website |
|
|
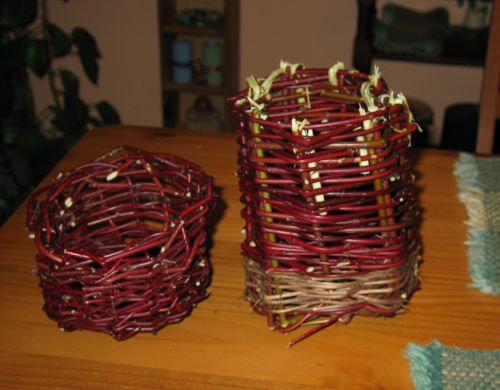
|
Here's a couple of baskets made from Red Osier Dogwood.
These were made at the
Wildwood Trackers meeting Nov
16/03, by Rob Bicevskis (left) and Walter Muma (right).
|
|
|
|
|
|
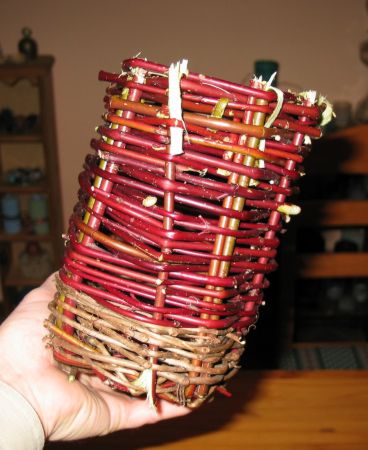
Detail of the left one from the above photo.
Not an artistic marvel (!), but functional and practical.
Notice the "in-and-out" winding of the branches.
(Basket by Walter Muma) |
|
|
|
|
|
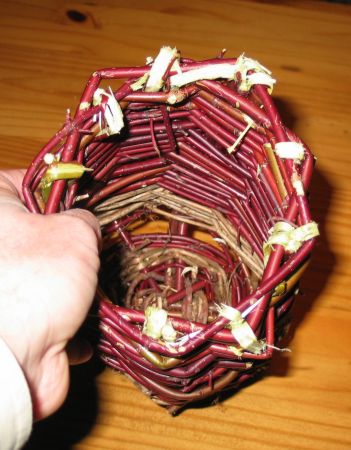
Looking into the basket to see the bottom.
This basket also incorporates some Virginia Creeper and Spruce
roots.
Again, notice the "in-and-out" (or is it
"over-and-under") winding of the branches.
(Basket by Walter Muma)
|
|
|
|
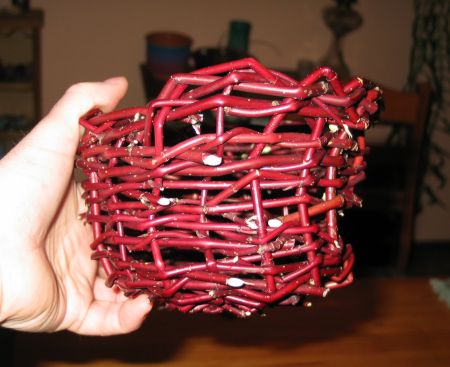 |
The other one from the photo at the top of the page.
Note that this one was made from thinner and smaller
branches than the above one.
(Basket by
Rob Bicevskis)
|
|
|
|
|
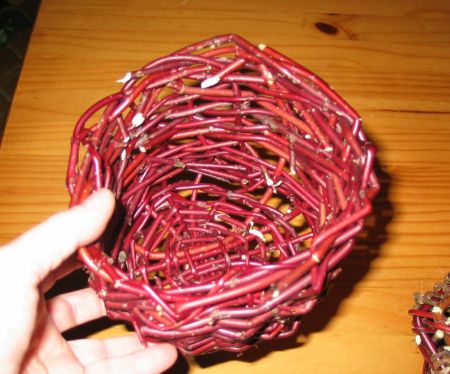
|
Looking down in to this basket to see how the bottom
was constructed.
Note that thicker branches were used for the upright
pieces.
Also note that this basket also uses the
"in-and-out" ("over and under") winding of
branches. This is essential for the basket to hold together.
(Basket by
Rob Bicevskis)
|
|
|
|
|
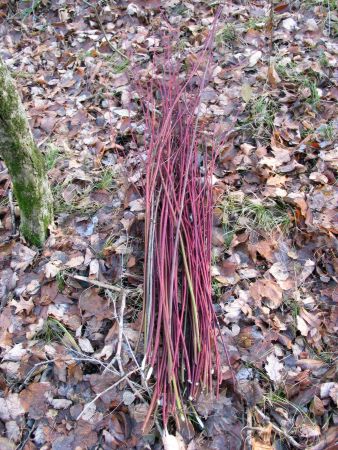
|
A bundle of Red Osier sticks that have just been
collected from a marsh, in late fall.
|
|
|
|
|
|
|
Here is a series of photos that show how to get started
on a twining basket, using Red Osier Dogwood.
(Basket by Walter Muma)
|
|
|
|
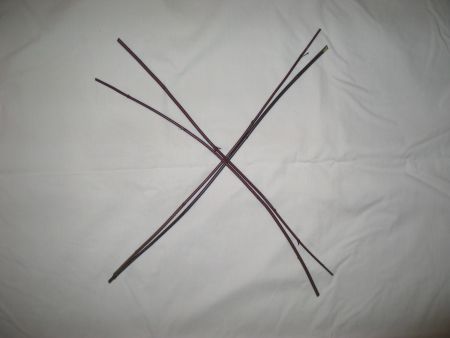
|
First, lay out a cross made of 4 sticks. Place each stick of the pair
opposite to each other. For example, for the pair that run from the
upper right corner to the lower left corner, notice that in the upper
right corner, one stick has its lower (thicker) end, and one stick has
its upper (thinner) end.
These branches will become the main uprights in the basket.
|
|
|
|
|
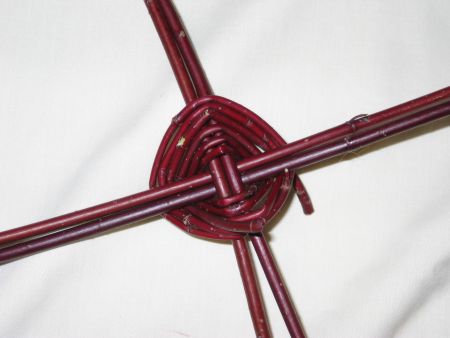
|
Using some thin branches (or a thin vine), wind around
and around the center, going over and under as in the photo.
|
|
|
|
|
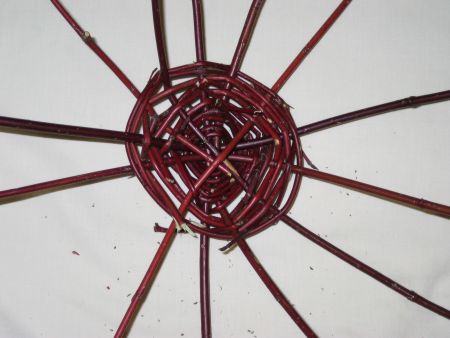
|
When you reach the point shown in the above photo, it's time to insert
more lateral sticks (these will be more uprights).
Separate out the pairs laid out in the first photo, so that the
main sticks are more or less evenly spread around the circle.
You will notice that there are actually 11 sticks in this photo.
That is so if you are winding with a long vine or something similar,
you will alternate the over and under action as you go around.
However, this probably won't be necessary with a Red Osier Dogwood
basket, as the branches that you will be using will be much shorter,
and you will therefore need to control the over-and-under differently.
If you don't understand what this means, just start winding the
small branches around and around. You will quickly find out what I
mean.
|
|
|
|
|
I don't have any more pictures of the making of this basket, because soon after this
I discovered that my uprights were too thin. As a result, they easily bent and
cracked as I wound the lateral sticks in-and-out. So I abandoned this particular
basket project: a learning experience!
|
|
|
|
|