 |
|
|
|
Home →
Survival →
Cordage
Bows Bindings
- Part I
by Allan "Bow" Beauchamp
(go to Part II) |
|
|
|

|
|
|
|
I have, from time to time in the Canadian bush, found that I have been in
need of stronger than normal binding or cordage. I always try to utilize
nature as much as I can, so I use what is available around me. A great
respect for nature is gained by using Mother Earth's bountiful
resources.
I remember one time when I was in the bush in the middle of
winter, and I was in need of some binding or cordage. I use the usual
materials one would expect to find. Shortly, I found myself needing more
binding. I decided that as soon as time permitted, I would start
searching for a more durable alternative for binding or cordage.
I found myself sitting in the bush one cold morning, leaning up
against a willow sapling can scanning the bush line for what might be a
good solution to my problem. Nothing seemed to strike me as a better
answer than what I had been using. I got up to move around a little. As
I was getting up, I realized this little sapling was holding my weight
very well.
I figured, "it must be a tough little tree!" Then I realized, if it
was that tough, how tough would it be for a binding?
I started the process of making a binding by cutting down the side of
the sapling a length of about three and a half feet with my small knife.
(An exact length at this point really does not matter, but this will
give you some idea for a good starting point.) |
|
|
|
Photo 1
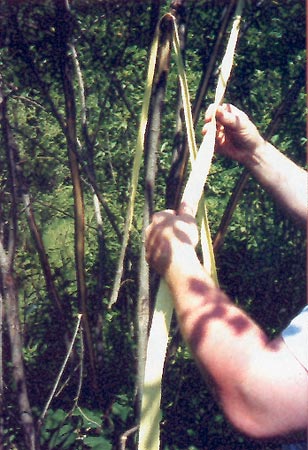 |
In Photo 1, you will see a piece
of cut sapling bark with the inner side showing. I am folding this
piece of cut bark in half lengthwise. This will strengthen it. I try
to keep both halves the same width while I am folding it, as this
will distribute the weight more evenly, and allow for a stronger
piece of binding. |
|
|
|
|
Photo 2
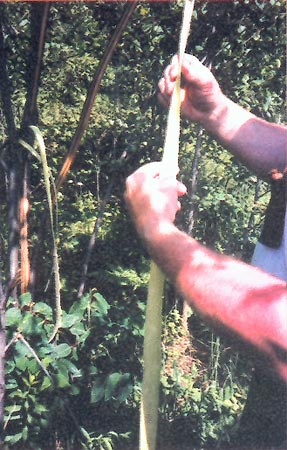 |
Next, I remove another piece of sapling
bark (Photo 2) and use the same process of folding it in half
lengthwise. You can see that I have laid the first piece over a
small branch stub (you have to be able to remove the binding from
the branch once you've made it!). I try to find a small branch at
about eye level to work with when forming my binding. This will help
to give your arms less strain when you are first learning this
process. It will also allow you to see what you are doing easier. |
|
|
|
|
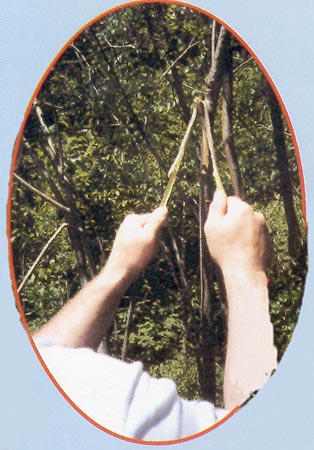
Photo 3
 |
Photo 3 shows more cut pieces of
willow sapling bark. I am now ready to begin the next phase. The
number of pieces you choose to use will depend on which type of
binding you want to make. At first we will make an all-purpose
simple, single, strong binding. Once you have practiced and have a
real feel for making binding, I will explain some more options.
Later, I will even give you some insights as to how strong this
binding will be. For now, we will continue with the developing stage
of our binding techniques. |
|
|
|
|
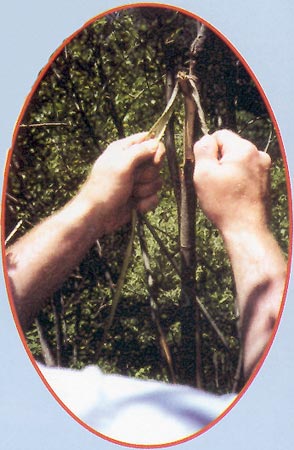
Photo 4
 |
We are now ready to start the twisting
segment. In Photos 4 and 5, I am using "one" single piece of
the willow sapling bark. I have folded this strip of bark in half
and draped it over a branch stub. Working with the right-hand side
first, I start twisting this side to the right (I always say, "start
right -- twist right"). This is awkward at first, but stay with it,
and you will see the advantage of this labour soon enough. I twist
this piece of bark until there are approximately 5 or 6 tight
twists.
|
|
|
|
|
Photo 5
 |
Using your other hand to hold the
tightened twists is very important. Otherwise your binding will be
too loose.
Once the right side is as tight as you can comfortably make it,
hold it in place and start twisting the left-hand piece of bark.
Repeat the same process as you did with the right-hand side,
remembering that the left-hand piece also gets twisted to the right
-- the same twist as the right-hand piece. |
|
|
|
|
When you have completed both side (the same tension and twisted distance
-- approx 4 inches), you are ready to make the crossover. Take the
right-hand piece and bring it up and over top of the left-hand piece,
towards the left, while simultaneously bringing the left-hand piece
under and to the right. Hold the pieces at about a 45 degree angle from
each other. Once you have crossed the right-hand piece over the
left-hand piece. Now for the tricky part ... you have to switch hands,
as right now your arms will be crossed; your right arm/hand will still
be holding the right-hand piece (now on the left side), and your left
arm/hand will still be holding the left-hand piece (now on the right
side). You have to bring the two ends down and switch hands, so that
your right hand will be holding what used to be the left-hand piece, and
vice versa.
Once you have accomplished this change of hands, pull the two ends
apart to about 45 degrees again. Now simply repeat the crossover step.
Continue to repeat this crossover process until you near the end of the
strips of bark.
I have found that some people have had one side tighter than the
other side, and when they have tried to bring the twisted piece over,
they will have only just "wrapped" this around the other piece. If you
do this, you will actually be placing the entire load on just one side
of the twisted bark.
You want to start off with equal tension on both sides, so once you
spread the twisted pieces across each other, you will be keeping the
tension equally on both sides. This will share the load, allowing for a
more equally strengthened binding.
It will seem awkward at first, as with any new skill, but practice is
always the key to proficiency. |
|
|
|
Photo 6
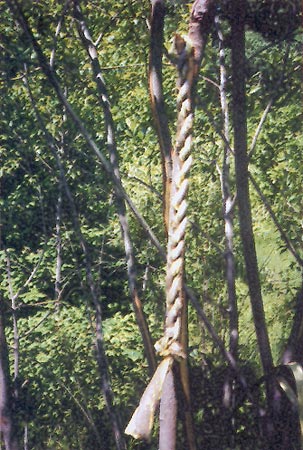 |
Photo 6 shows that after I have
completed this process, with the full length of my bark strip used
up, I now have a completed piece of very abrasive resistant and
string for of binding. To make a knot at the end of the strips of
bark, I have simply brought all the twisted strips together and tied
these through each other. Remember to keep it simple at first. You
can expand on your new skill later. This is the basic process of
fabricating some very strong, durable binding material. |
|
|
|
|
Photo 7
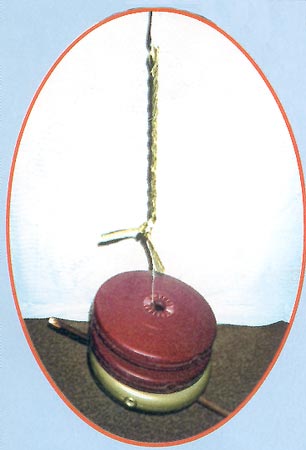 |
I tried an experiment with my new
binding. I used a small piece of binding that I had made and tied it
to three 25-pound weights. I hung these suspended above the floor,
as shown in Photo 7, and left it hanging for a considerable
length of time before removing it, to see how well it would hold up.
If a piece of binding can hold 75 pounds, it will be very practical
to use in the bush. |
|
|
|
|
I prefer to have different binding or cordage for different purposes; some
for quick and small tasks, and some for heavier loading. Take the time
to practice this skill. Experiment with other kinds of bark, and do not
always look for the perfect pieces as we have seen here. The strength of
the binding we just made was accomplished with a small sapling, and has
served our purpose.
From time to time in the bush, we use saplings for may different
things. Take the time to ask yourself: "Am I using it to the fullest
capacity?" In another article, about
snowshoes, I show how to
make improvised snowshoes. While reading this article, do you think of
using the bark first before making the snowshoes? If you do not, you now
have a new idea to think about -- the binding. It may be possible to
make binding from the bark of the saplings you use to make the
snowshoes. Then you will have a ready source of good binding with which
to ties the snowshoes together as you make them. Also, the binding can
be used to tie the snowshoes onto your feet.
When you first begin to work with this skill of making binding, think
of what else you could utilize this technique for. Think of all of the
situations you have been in and when this would have come in handy. You
might use it to tie the top of your shelter together, or during the
middle of the night you look out and see a foot of snow coming down.
Will you rest easy?
The next time you are making binding or cordage in the bush, ask
yourself a question, "Does this piece I have fabricated have the
capabilities to hold any substantial weight at all?"
There are many different materials around you in the bush to make
binding or cordage with. It is up to you to experiment and learn what
works best for you, and what materials are available in the area where
you are located.
I have made cordage and binding from many different types of
materials. I experiment with just about anything I can find in the bush.
I have even tried some man-made materials such as, gauze from a
first-aid kit, and the extra bottom piece that was on my long
shirt. Other materials have included dandelions, many different kinds of
grasses, cambium layers of trees, tree barks, and the list goes one. You
might not have willow bark where you venture out to, but think of the
concept, practice it, and then try materials you might have in the area
around you. Ask yourself, "Can I make a strong binding out of fresh cut
long grass?" Or, "What would happen if I took three of these twisted
bindings and braided them together?" Try any anything and everything. It
is for you to learn.
When you are in the bush, take the time to listen to Mother Nature.
She will show you that there are many options for you to use. Remember
that we are never really "stuck" in nature; we are just "stuck" without
options.
I will outline some more variations of binding making, and some other
applications to give you in Part II.
Go to Part II. |
|
|
Photographs and text on this page Copyright by Allan "Bow"
Beauchamp; used with permission of the author.
This article originally appeared in Wilderness Way magazine, Volume 6, issue
1 |
|
|
|
|
|
|
|
|

