 |
|
|
|
Home →
Survival →
Fire →
Bowdrill
Advanced Bow-Drill
by Peter Moc
(photos by Peter Moc except where
otherwise indicated) |
| |
|
Introduction
Being able to get a coal in your backyard on a
sunny day with a proven bow-drill set does not mean that you would be able to
get a fire started in an actual survival situation. There are numerous variables
that will make getting a coal exponentially more difficult. For example, you
must be able to get a coal with a variety of woods, in a variety of conditions.
The wood may be damp. You may not have a knife. You may not have any cordage.
You may already be tired. For these reasons, it is good to practice dealing with
each of these factors, first separately, and then bring them all together.
In a survival situation, it is difficult to
predict exactly how a stay will unfold. There will always be unexpected
situations to deal with. You will have to find the wood. Where is there a grove
of good bow-drill trees? I don’t have a knife. Where can I find rocks to use
as tools? What trees can be used for cordage? How should I pace myself? By
challenging yourself, you will be better able to handle a wide range of
conditions and increase your fire-starting reliability.
I can’t overemphasize the importance of
keeping a log of your observations and discoveries when working on your
technique. This will help greatly to see relationships between different woods
and conditions and how to approach them.
|
|
|
|
Working with Different
Woods
The first step in advancing your bow-drill
technique is to challenge yourself with different woods. This will enable you to
test your technique and reveal whether it is a real communication with the wood
or just in your head. This is the first step in learning to “talk with the
wood” and listen to what it tells you.
There are two ends to the spectrum of wood
hardness: hard and soft. Generally, you want to use the soft woods in a real
situation. Damp hard wood is virtually impossible to start a fire with. That is
why you want to use only dry woods when working on density differences between
woods. Another factor that you want to explore is the state of decay of woods.
How does the type and extent of decay affect fire-making? Generally, rot softens
wood by breaking down the fibres. In hard woods, however, it can harden the
wood, making it brittle at the same time.
First, start off with the soft woods. Find some
aspen/cottonwood, etc. that is almost punky. It should almost crush right in
your hands. Try getting coals with this using your regular bow and handhold. All
you need to make is the board and the drill. Don’t worry if the drill keeps
burning at the handhold. Just lubricate it with some shoe polish, etc. You want
to get the feel of how the wood reacts. Don’t waste time keeping the handhold
from burning in at this point. Note any changes needed in your technique to
obtain a coal.
Now, experiment with the other end of the
spectrum. Find some hard wood and make a spindle and board and handhold as well.
Initially, this should be with relatively solid, very dry wood. You will need
the hardwood handhold as well or else you will have constant burning problems.
Some challenging hard woods are the hickories. These are some of the densest
woods in some areas. You may also try ironwood, blue-beech, and the oaks, among
others. Again, note what changes you had to make to obtain a coal. You may have
to really go to extremes in your technique, as well as your set-up.
The powder step becomes extremely
important with hard woods. This is when you will really hone and learn to fully
control your technique. The powder must be totally fuzzy. If the powder is at
all chunky, getting a coal will be almost impossible. Also, the temperature that
you must get the powder to before it ignites is significantly higher than with
soft woods. You may be making ridiculous amounts of smoke, but still with no
coal. Sometimes you just can’t get a coal that day, especially with the denser
hard woods. In that case, just look at it from the perspective that you are
strengthening your muscles and refining your technique. Remember, you would
never use a hard wood in a survival situation unless you had slipped on a rock
and bumped your head!
There is one more category of wood types to
hone your technique on. This is the pine group. Many people will tell you not to
use balsam fir, or the spruces, but I find these to be some of the best woods to
use! I have found only the pines to have very pitchy wood. White pine is a very
good wood to practice on. You may find you are getting coals rather easily. In
this case, try using wood that is relatively green. This will increase the
challenge a little! But this is jumping ahead.
Finally, you can try using different
combinations of woods together. For example, use a soft spindle with a hard
board and vice versa. Does it make any difference? Write your observations down
in your notebook.
|
| |
|
Working with Different
Dimensions
You know want to try using different sizes of
apparatus. There are two benefits of this. One is that you will be able to find
the “ideal” sizes for yourself (and realize that these can change depending
on materials and weather conditions). The other is that you will become more
versatile and be able to make use of less than ideal materials.
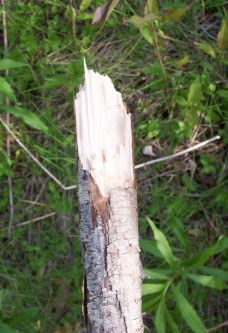
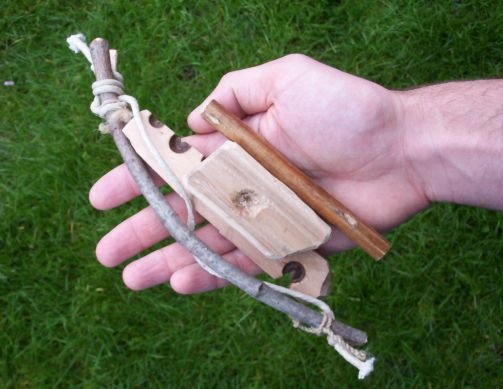 |
An example of reducing
size. Much smaller sets have been made by others. See how small you
can make yours! |
Experimenting with this is relatively
straight-forward. Just change the dimensions of your equipment slightly, one
component at a time. You may already have gotten a taste of this. It is not
unusual, when you are learning the basics, to go through spindles and boards at
a high rate. See how short of a spindle you can use and still manage a coal.
Also, try using really thin and/or really narrow boards.
Change your notch size and shape and see what
kind of effect this has. See how big of a handhold you can use without it
getting in the way (pretty big!). This will show you that not everything has to
be all pretty and clean-cut. You will learn what the important aspects of the
set are that relate directly to the coal-forming effort.
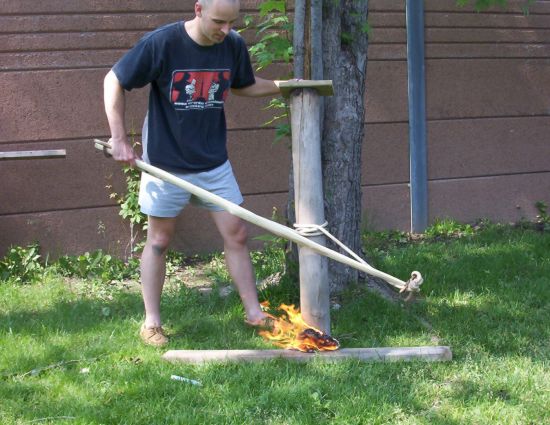
Finally, try using different lengths of bows,
especially shorter ones. You may find that getting coals with shorter bows to be
a little more difficult and uncomfortable. It is good to get used to it now
because you will generally have to use shorter than ideal bows when using
natural cordage materials.
|
|
|
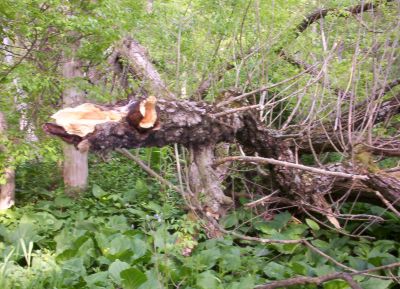
See how big you can
make your set. **Note: don't try this at home :) |
|
| |
|
Working with Various
States of Woods
The last way you can challenge yourself with
woods is to try getting coals with varying conditions of wood. In other words,
use green woods, wet woods, and rotten woods. Rotten wood was already mentioned
previously, and is pretty straight-forward. Remember to try different species as
well as from different locations. Different woods are subject to different types
of rots and this also depends on the way the limb/tree died and where it fell.
Branches that stayed attached to the standing tree tend to experience a dry rot.
The wood tends to slowly turn into powder. Limbs that fell off and landed on wet
ground tend to experience a wet rot. Both types can be used for fire-making.
Collect a variety of woods you think might be
good for bow-drills and ones that you think are not so good. Collect rotten,
totally punky, green, and dry woods from a variety of species. See how the
condition of the wood affects fire-making. You will find the green woods to be
very challenging! You should be getting a feel for how rotten and how damp a
wood can be and still be usable. You may find some woods to be so water-logged
so as to weigh more like oak than cedar! The whole point of this is to be able
to recognize, just by looking at and feeling a branch, whether you get a coal
from it in a survival situation.
One more way of challenging yourself is to take
a proven bow-drill set and immerse it in a bucket of warm water for an hour.
Then take the set out and immediately try to get a coal! This will help with
your technique. Don’t bother putting the handhold in as you will have trouble
with burning. This exercise to improve your technique, rather than to waste time
keeping the handhold from burning. You will find that , as long as you can carve
away the saturated surface of the wood, getting a coal isn’t too difficult.
Unless the wood is saturated right through, which you should immediately
recognize when you pick it up, you should be able to get a coal (if it is soft
wood).
|
| |
|
Finding Wood in the Forest
and Seasonality
You now want to put together all the components
and take it to the forest. Pretend you are in a survival situation and try out
different branches you find. Many will be too rotten to use. A good way to test
this is to snap the branch in question in the crotch of branching tree and see
if it breaks by splitting. If it just breaks with a weak thud and is almost a
flat break, it will probably be too far gone to use. It should break such that a
split is produced. This way you know the fibers are still somewhat intact.
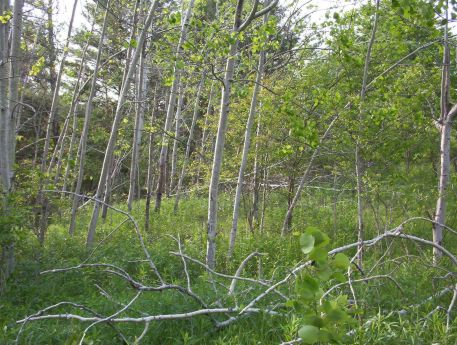 |
An excellent place to
look for wood is a grove of proven bow-drill trees, in this case,
trembling aspens. |
Bring your knife and cordage out with you and
try getting coals out in the “field”. First, use your knife to its fullest
ability. You may find you have more success when you take a large branch and
whittle all the parts from it. This is due to the fact that the moisture stays
just in the first couple of millimeters in from the surface with the core being
relatively dry. Also, the outside of the branch usually is the first part to
rot.
After you have become reliable at getting coals
in this manner, try using your knife less and less. Try to take the fewest
number of “whittles” as you can. Instead of carving the spindle from a thick
branch, find a branch that is already roughly the thickness of your spindle. Try
snapping wrist-thick branches to produce boards. This can be done by placing a
long, wrist-thick branch between two stout, closely-spaced trees and levering it
until it snaps. Keep snapping off sections until you get some relatively flat
ones. Sometimes curved sections will work, as long as the spindle will stay in
position long enough to get a decent hole started. In other words, learn to rely
less and less on your knife. Eventually you will find it to be very nice to
have, but not a necessity (unless there are no rocks where you live!).
|
Dead
cedars |
Dead aspen, split
open |
|
(Photo by Walter Muma)
|
|
Make a habit of trying the bow-drill at least
once in every season using just a knife and a string. Note the problems that
each different season brings and find ways to deal with them. Spring brings high
moisture, but finding wood is easy. Summer brings mosquitoes, etc. and finding
wood can be laborious when the vegetation is thick. Fall is probably the easiest
time for the bow-drill. Winter means you cannot use wood that is on the ground
and special preparations are needed for your work area (i.e., removing the
snow).
 |
Contrary to what you
may have read elsewhere, useable wood can sometimes be found in damp
areas. Willow wood is often dry enough to use if you shave off the
wet outer portion. Look for willow branches that fell off several
months earlier that still have the bark on them but are no longer
green. Often, large willow branches found on the wet ground will
produce excellent bow-drill sets. |
|
|
|
|
|
Wrap-Up
Once you have mastered these techniques, you
will have a very valuable survival skill. In very few situations would you have
no knife or pre-made cordage of any kind. In fact, the only time you would be
without these items would probably be in a self-imposed primitive wilderness
stay. There is a fairly large jump to being able to make and use a successful
bow-drill set without a knife or cordage. But with these items you will be able
to confidently start a fire in any place, at any time of the year.
|
| |
| © 2000 Peter Moc |
|
|
|
|
|
|
|
|
|
|

