|
|
|
Home →
Survival →
Fire →
Fire From Ice
|
|
|
Fire from Ice #3
Perfecting the Ice Lens
Photos and text by Rob Bicevskis
(Page 2 of 2) Fire from Ice #3: Page 1
Page 2 |
|
|
|
|
|
How to Make an Almost Perfect Ice
Lens Not
being satisfied with the previous jig, I went off
and designed/built a bunch of things. |
|
|
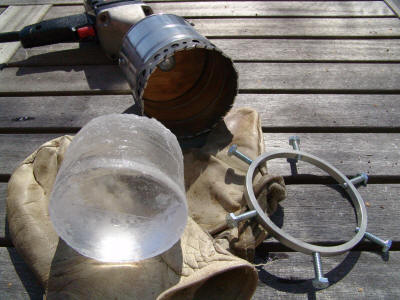 |
I wanted to feed my
lens machine with cylinders of
ice. A cylinder is already circular in two
dimensions - a good start. I took a tin can and
soldered a piece of steel strapping to the open end.
I cut teeth into the strapping. The strapping
isn't hardened, but for ice it's just fine.
This picture shows an ice cylinder "drilled" out
with the modified can.
Beside the ice is a piece out of an old
disk-drive that I used to hold the ice cylinder. |
|
|
|
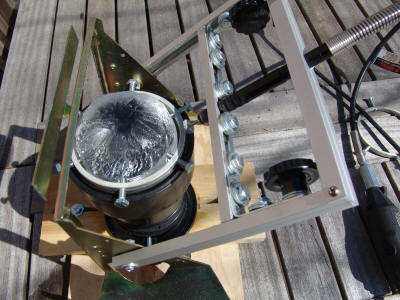 |
This picture shows the "machine." It works on
the same principle as the "field jig." There
is an arm which "rotates" about a pivot point.
On the arm is a rotary tool with a coarse bit.
The base assembly holding the ice in its frame can
move up and down as well as rotate. (The base
assembly can also slide back and forth for
experiments with plano-convex lenses.) The ice
lens can be removed along with the frame and then
inverted to machine the other side. The frame
also provided a convenient way of holding the lens
without melting it. |
|
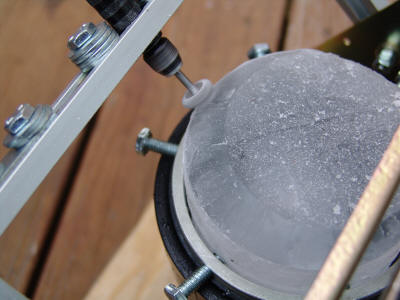 |
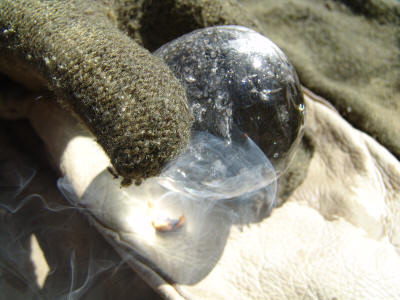
This is a
close-up of the "business" portion of
the machine |
|
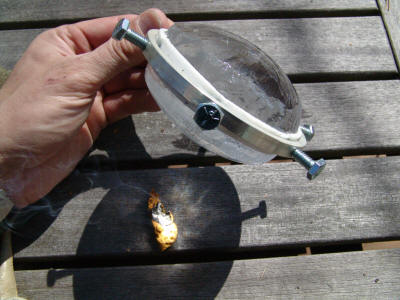 |
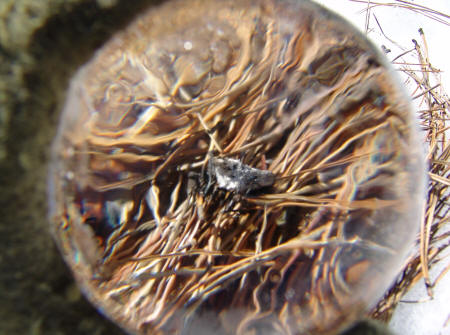
Did it work? A picture with smoke is better
than any words. :-)
Note - this lens wasn't as aggressive in it's
curvature - but the compensating factor was the
optical quality. |
|
 |
Another view with the
lens removed from its frame. |
|
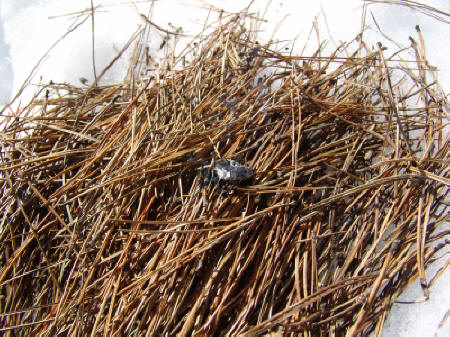 |
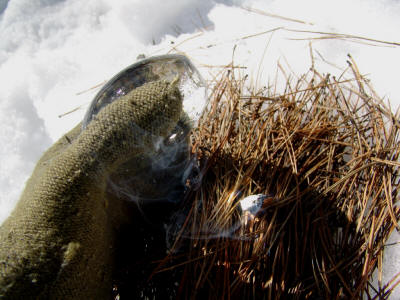
This
picture and the next were taken with the same
camera position.
The first picture (to the left) shows
pine needles with some burned tinder fungus.
The second picture (below) was taken with the ice
lens placed in front of the camera lens.
This shows the magnification of the ice lens.
Due to melting, I rushed this lens so the optical
quality is not the best.
So why try to make an optically perfect ice lens?
Stay tuned.... |
|
|
|
|
|
|
Eureka - it was always staring me in the Face!
From my first day playing with ice lenses, the word
"sphere" kept coming up. If we think about a
double convex lens, it is just a sphere with its
middle removed. Why not use the whole sphere
for an ice lens? It certainly has a very
aggressive curvature and as long as the ice isn't
cloudy, the extra ice in the middle doesn't do any
harm. I tried it. Wow. |
|
|
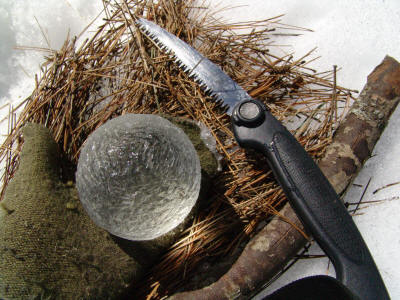 |
I started with a block of ice. Using a small
hand saw, I first carved a cylinder. I then
started to round out the top and bottom of the
cylinder. In about 20 minutes I had something
that looked like a sphere. |
|
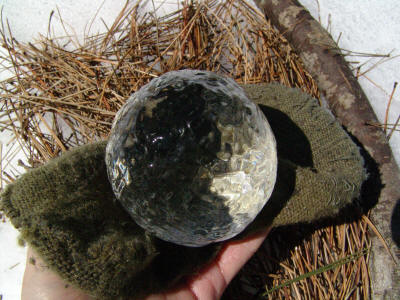 |
A bit of hand polishing... |
|
 |
Some more hand polishing. The advantage of making
a sphere is that "everyone" knows what a sphere
looks like.
Imperfections are pretty obvious. In a
double convex lens, it's far more difficult to
identify flaws.
The technique for hand polishing is similar to
packing a snowball, or making meatballs. The
constant "packing" and rotating motion of the hands
tends to improve the geometry of the sphere.
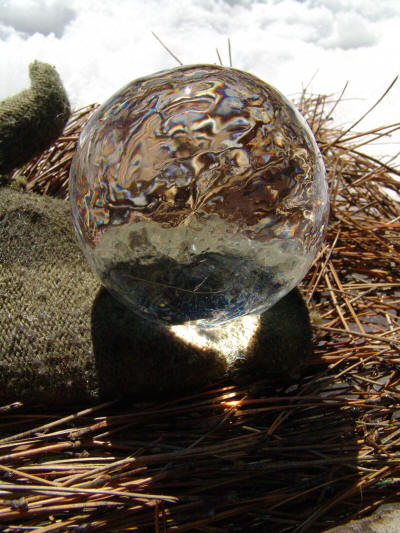
This picture shows the very short focal point for
this lens. |
|
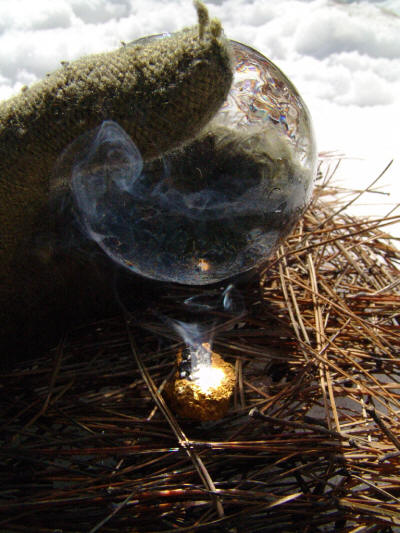 |
Did it work? The tinder lit so quickly that I had
to be fast on the camera shutter!
If You Don't Read Any Other Text on this Page,
Read this:
One very important feature of an ice sphere is
that it contains an "infinite" number of lenses.
Why is this important? Let's think about a
normal double convex lens. Once you are done,
there is only one "optical axis." As soon as
you tilt the lens in one direction or another, you
aren't taking full advantage of the lens.
(For a variety of reasons.)
Now, here's the
beauty of an ice sphere: you can rotate the
lens as much as you want. If the sphere were
perfect in shape, then any rotation would have no
effect. Given that these hand-made spheres are
not perfect, we can rotate the sphere and look for
the sharpest focus or dot. It is surprising
how what I thought was a pretty good sphere worked
extremely well in certain orientations and poorly in
others.
Given the ease of construction and the
flexibility in use, I am quite convinced that an ice
sphere is an excellent candidate - if not the best -
for an ice lens.
|
|
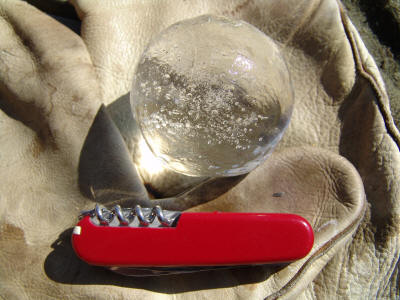 |
My next question was to find out how small of an ice
sphere will still work and how quickly I could make
one. I gave myself a 15 minute time limit and
started with a "random" chunk of ice. The picture on
the left shows what I came up with.
Did it
work?
The proof is in the smoke in the next
photo (below). |
|
|
|
|
|
|
It was quite a journey for me to make fire from ice.
I hope you have gained some insights from reading
about my discoveries and hope you will share some of
your thoughts or experiences.
Email Rob. |
|
|
|
...back to
Page 1 |
|
|
|
|
|
|