 |
|
|
|
Home →
Survival →
Fire →
Flint and Steel
Knife & Stone Fire Starting
by Allan "Bow" Beauchamp |
|
|
|
Fire starting in the northern bush can be a real task, especially with the
weather extremes that challenge us so often. I enjoy being out in the
bush on cold winter nights. I often travel on snowshoes, and just wander
all night long. There are many ways to start a fire without the
assistance of matches. I have been working on many of these different
fire starting techniques for many years, and have seen advantages and
disadvantages for each technique.
Each fire starting method also has many variations. These variations
could offer the bush traveler something that could be used in any area.
One method alone will not do everything in every situation
everywhere, and like I always say in my articles, we always need to have
"options." Personally, I prefer to rely on skills that are the most
practical and functional.
Since I spend a lot of time in the bush, I am not much of a "fair
weather fella." If I talk about sleeping in -45°F in the snow and
starting a fire in a primitive manner, I mean just that. By doing this,
I have found that it helps my "options" list. Some things you may read
about that are suppose to work in these elements can fall very short on
performance. This means that I am constantly trying new techniques, and
am always working on the old ones to help me find more and better
"options."
I had found that the knife and stone to be the one way of starting a
fire that I revert to more often than most of the others. It is very
simple, requires minimal gear, which I most often have with me anyway,
and works well in most environments that I have found myself venturing
out into.
When I speak of knife and stone fire starting, I mean just that. I
always have my knife with me in the bush, and finding stones in upper
Canada is not a big deal.
When I selected my knife, I tried to find characteristics that would
work for me. Selecting a good knife will make all the difference in the
world with your fire starting capabilities. I selected a knife that had
a high carbon count (older knifes seem to have more of these blades than
the newer style of blades do).
Most stones that I find in my area are not actual "flint." They fall
into the category of "chert," and in this area, you are most likely to
spot white quartz. If you read my article on Two Stone Fire Starting in
Volume 6, Issue 2 in wilderness Way magazine, you will remember that the
hand strikers were also made of flint. The stones that I have found
around here are harder than steel, which is why my knife and stone
method works well for me.
As I mentioned earlier, each area requires its own unique skills and
materials, so it is up to the individual to explore the best tools and
methods for them. |
|
|
|
Photo 1
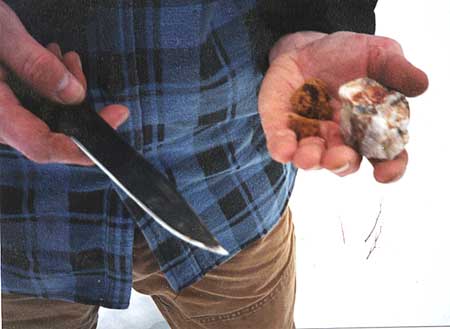 |
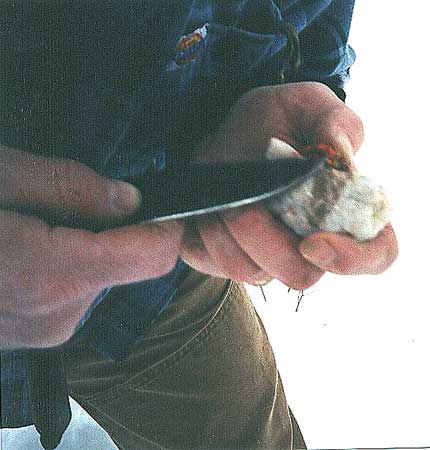
In Photo 1, all of the components needed to use the knife and
stone method are shown: a knife, white quartz stone straight from the
ground, and tree fungus. Each piece has its own purpose. The stone is
harder than steel, so that when it impacts with the knife, the knife's
softer blade sends off a spark. By impacting the two components, the
small spark is caught in the fungus, which will hold the heat very well,
and allows it to develop into coal. Simple enough!
|
|
|
|
|
Photo 2
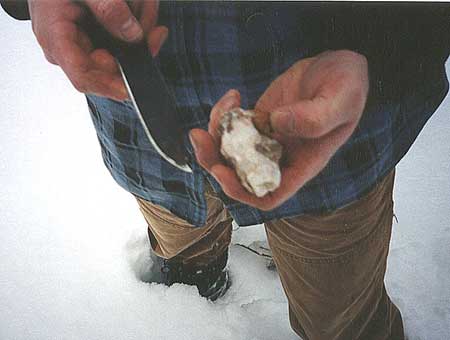 |
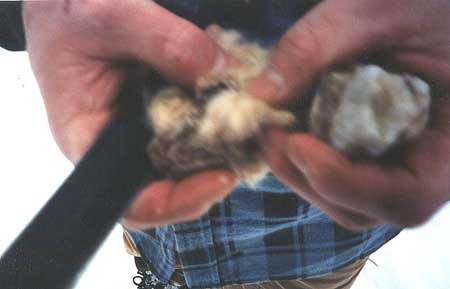
Photo 2 shows the pieces in my hand in position before the actual
striking of the spark. The quartz stone rests in my palm. I try to find
a comfortable position for the rock so it sits easily. |
|
|
|
|
Smaller pieces of rock are break-aways from bigger pieces; hence, they
have at least one sharp comer. If you do not have a small sharp comer,
your sparks will not be as good as they could be for sparking. Why? It
is because the sharp comer of the rock impacts with the knife sending a
small shaving of spark off. I have, from time to time, used rounded
stones that I have found on lakeshores. By striking them with the tip of
my knife, I have gotten sparks, but they are not as strong.
Using a sharp edge is the best. How do you know it is sharp? Run the
stone's edge along your forearm slowly; and if it feels like it would
cut you if you put to much pressure on it, you have a good sharp edge.
So, hold the small stone in your hand, and find an edge that is
sharp. This edge must be positioned where the knife-edge will intersect
with the rock. The back edge of the knife will be impacted against the
stone's sharp edge, and cause shavings of metal from the back of the
knife blade to fly off into a spark. Hold the stone in one hand loosely;
then grab the knife along its spine with the sharp edge facing your
hand.
When you cradle the quartz stone (or flint) in your hand, try to get
the sharp edge on the "horizontal plane." Then, move the angle of the
sharp edge of the stone less than ninety degrees, so that it seems that
the stone's edge will shave a piece of knife off.
This technique does have some disadvantages, but I feel for the
advantages the practical gains learned far outweigh the latter of the
two. The disadvantage is that the knife blade has the sharp side facing
towards your inner hand. This could cause a nasty cut should your grip
slip, because of cold or wetness. If this poses a real concern for you,
try using a Nicholson brand me. It will allow the same availability of
sparking, but in a safer manner. However, you have to remember, to carry
the me with you in the bush! Practical?
Now, you are ready to add the other component. Taking your knife
or the file) in your hand, use the thumb of your hand. Place it on one
side of the spine and your two first fingers on the backside. The knife
should be held in such a manner to display the back edge of the knife
facing away from you, and the sharp edge facing towards your inner hand.
Ensure the knife's sharp edge is away from the palm of your hand. Slide
the knife so that your fingers grip it about mid way along the blade. I
have found that this works very well for me.
The stone's edge should be in the palm of one hand, with the edge
less than ninety degrees, and the knife held vertically in the other
hand. Practice this method gently at first, getting a feel for the knife
and sparks. Try a vertical stroke from the knife's back edge, impacting
and creating a spark as it glances against the sharp edge of the stone,
doing a slow follow through each time.
Using a vertical motion, we want to just glance the blade's back
against the sharp edge. Not much impact is needed here, so do not try to
hit them together too hard; just let it flow. You will see that one time
you will get sparks and the next time you will not. Stay with it. Try
learning something from each try until you feel comfortable.
Practice this for a while until you have it fine tuned. You will know
you are ready for the next step when you can hold it comfortable and use
good follow through strokes that will make a spark each time. Soon you
will feel that you are ready for the next step -- the sparking stage. |
|
|
|
Photo 3
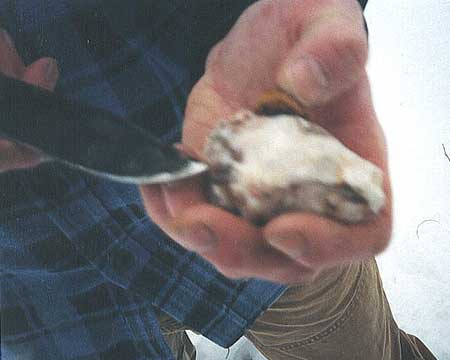 |
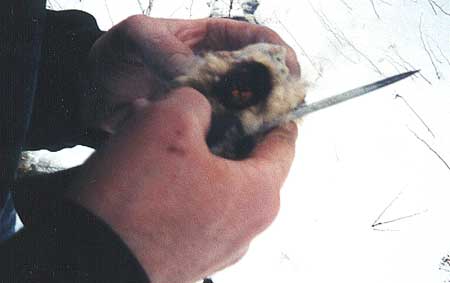
I am using my tinder fungus piece. Photo 3. This particular piece
is from the birch family This fungus is found in the area that I am in,
and I use it as much as I can. I am holding the desired position for
the fungus and the stone as a combination. I cradle the stone in my palm
loosely, then after selecting my fungus tinder, position it under my
thumb as seen in the photograph.
|
|
|
|
|
This can seem very tricky the first time juggling the tinder, and
holding the stone. If you find it hard, try using a bigger piece of
tinder. What you are looking to accomplished is that the piece of
tinder must catch the spark for this technique to work. If it is over
the edge of the stone too much, the knife's backside, when hitting the
sharp edge of the stone, will simply break it off. If the tinder is back
away from the stone's sharp edge too far, it will not catch any spark,
no matter how good of a technique you have.
Hold the stone in your palm, and stand the knife's edge against the
stone's sharp edge. Look at it. You should see the stone's sharp edge at
less than ninety degrees to the knife's vertical position. Then, slide
the tinder under your thumb until it just touches the knife's back side,
and hold everything in place. With a glancing blow from the knife, try
to lightly create the spark that you practiced earlier.
With every glance, I always check to see if a spark has caught in the
tinder. There have been many times that I have thought that I had not
gotten any sparks, only to see them break off with the next glancing
blow from my knife and end up on the ground. Remember: Just because you
do not see it, do not think that it is not there.
|
|
|
|
Photo 4
 |
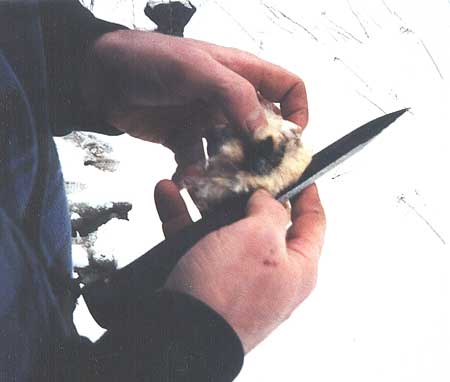
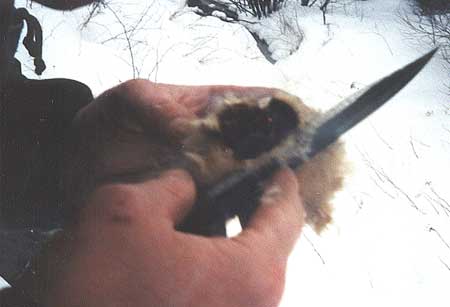
In Photo 4, you can see these three combinations held in the
right position to work together: the vertical position of the knife; the
tinder as dose to the knife's edge as we can get it; and the less than
ninety degrees of the stone (on the horizontal plane). Notice again how
I have my fingers positioned away from the blade's sharp edge.
|
|
|
|
|
Photo 5
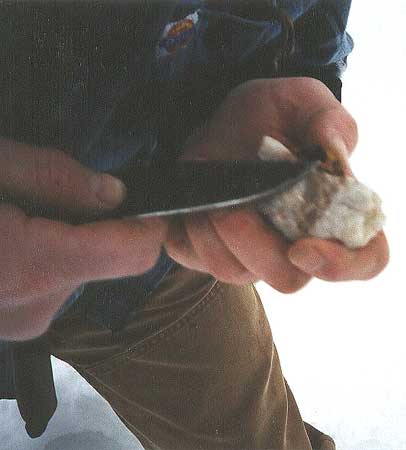 |
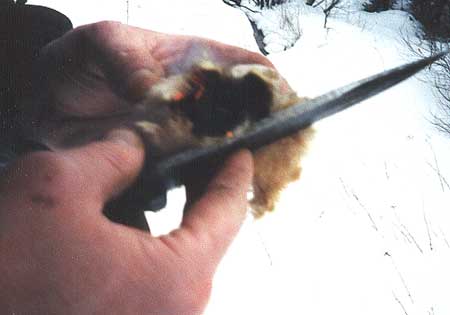
Photo 5 shows the tip of the knife, and that the tinder has indeed
caught the spark. This is easily seen against its brown soft exterior,
and this particular tinder has a distinct smell. |
|
|
|
|
Photo 6
 |
You can see at this point the sparking process. Photo 6. The spark
is trying to develop into coal for fire starting. Gently blowing on the
coal, and with some patience, it will spread quite easily. At this
stage of the fire starting technique, the coal must be transferred to
something that will continue its life and maintain the heat created
until it is fully developed into a fire structure. |
|
|
|
|
Photo 7
 |
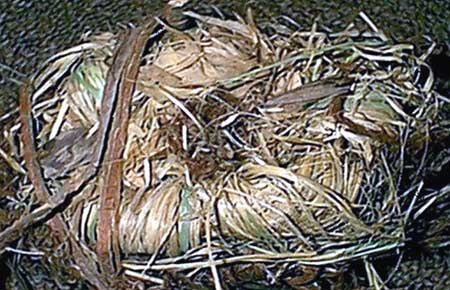
In Photo 7, I have collected some cattail from the swamp that I am
standing beside. I harvested and made it like a small blanket. Place the
tinder from the top of the stone and transfer it to the cattail blanket.
This blanket of sorts has its advantages here. It will not only extend
the life of the coal, but will shelter it as well. |
|
|
|
|
Photo 8
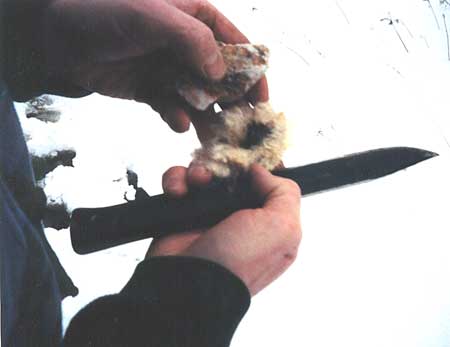 |
Photo 8 shows this process happening. Dump the tinder fungus from
the stone into the cattail blanket. It is not hard to see how quickly it
transferred its heat from one coal to the blanket coal. |
|
|
|
|
Photo 9
 |
Once this step is completed, Photo 9, close the blanket of cattail
around the coal. This will hold the tinder together, and assist in
extending the life of the tinder fungus piece. This will allow you to
initially use a very small fungus tinder coal on the stone. When the
cattail blanket is closed, any heat generated from the tinder coal, will
be held in the blanket. You will not have to take a long time to realize
how much heat is actually transferred. Your hands will tell you soon
enough!
|
|
|
|
|
Photo 10
 |
Open the cattail blanket from time to time and blow a few breaths of air
onto the tinder. Photo 10. This will assist in spreading the heat
on to the piece of cattail. |
|
|
|
|
Photo 11
 |
It is now becoming evident that the piece of tinder fungus coal is getting
very small, and the cattail blanket is the host coal. Photo 11.
This happens as the fungus coal gets used up.
|
|
|
|
|
Photo 12
 |
What is evident is that most of the initial fungus tinder is consumed.
Photo 12. This whole process has now developed a good coal base that
will be a great fire starting tool after allowing the tinder fungus to
transfer its heat to the cattail blanket.
I have, for the purpose of this article, collected some cedar bark
and taken the time to form it into a "cedar nest." This will now be used
to transfer the cattail blanket right into the center of the cedar
blanket. It will do the exact same thing that we did initially with the
fungus tinder to the cattail blanket.
However, at this stage you will see, by squeezing the cattail blanket
to maintain all of its warmth, and by gently blowing on the cedar
blanket, it will blow into a flame with a few good breaths and some
patience.
|
|
|
|
|
Photo 12a
 |
I have, for the purpose of this article, collected some cedar bark
and taken the time to form it into a "cedar nest." This will now be used
to transfer the cattail blanket right into the center of the cedar
blanket. It will do the exact same thing that we did initially with the
fungus tinder to the cattail blanket. However, at this stage you will see, by squeezing the cattail blanket
to maintain all of its warmth, and by gently blowing on the cedar
blanket, it will blow into a flame with a few good breaths and some
patience.
|
|
|
|
|
Photo 13
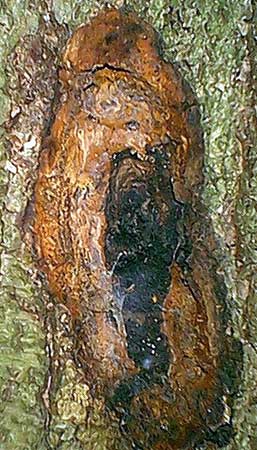 |
At the beginning of this article, I mentioned the use of fungus
tinder. The side you see is the side against the tree. When you look for
birch trees, and wish to find some of this tinder, you will see the
black side of this fungus, which is the outer side. Photo 13
shows the yellow birch tree that I harvested this particular piece of
fungus. Remember: when you remove such a big piece from the tree, it is
be a good idea to collect some sap, and fill in the wound on the tree.
My policy has always been: "If you use something from the earth, try to
add something back to the resources." |
|
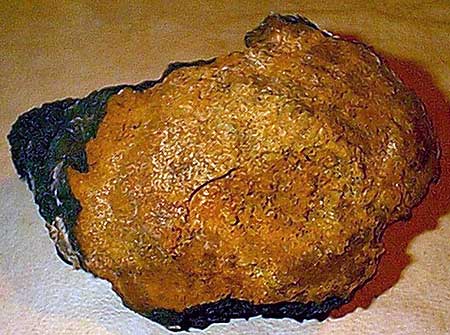 |
The tinder fungus as it was
harvested from the birch tree. |
|
|
|
|
I use this technique for fire starting most of the time. I find it
practical, in most environments, and if the available materials are not
too hard to find. It has been a good fire starting technique for me, and
there have not been many times when it has failed to produce a good coal
to get my fire going.
Whatever useful method you choose to use, take the time to try it in
all weather conditions. Then, practice, practice, practice! It will pay
off. |
|
|
|
All photos and text are Copyright Allan "Bow"
Beauchamp.
This article originally appeared in Wilderness Way magazine, volume 8,
issue 1
|
|
|
|
|
|
|
|
|

