|
|
Home →
Survival →
Cordage
Bows Bindings
- Part II
by Allan "Bow" Beauchamp
(go to Part I) |
|
|
|
|
|
|
|
If you read Part I, you will see that
this article is just an extension of an already developed skill. |
|
|
|
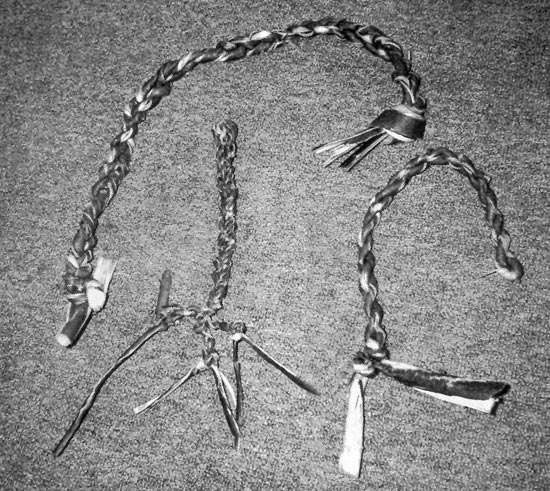
Photo 1
 |
I have again acquired some more pieces
of sapling bark. Photo 1. This time, instead of taking one
piece of bark, and bending it in half over a stick, we will change
the way we will start to make our binding by attaching the tops of
the pieces together. This is done with a simple over-hand knot (it
does not have to be fancy; it just has to work.) |
|
|
|
|
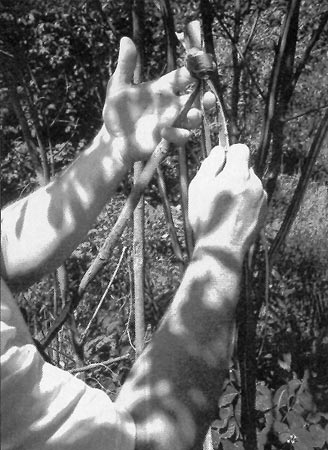
Photo 2
 |
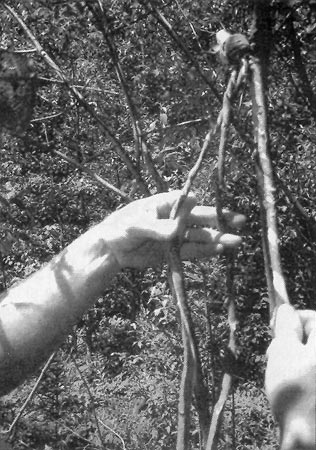
This is your starting "bend." Choose
three individual pieces to work with. Photo 2. Start the
process, the same as before, by taking the right single piece and
twisting it to the right. |
|
|
|
|
Photo 3
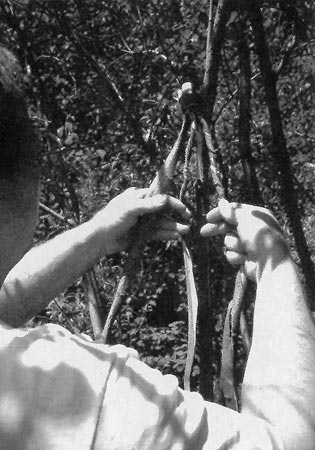 |
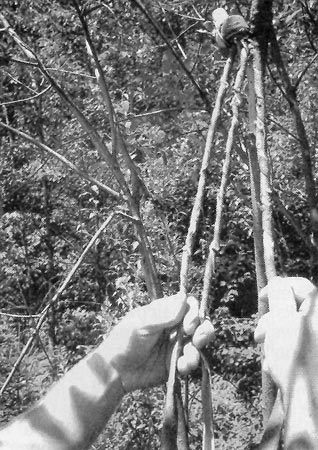
Photo 3 shows utilizing the left
hand to assist in keeping the pieces separated, as well as holding
the tension on the other pieces until they can be twisted. |
|
|
|
|
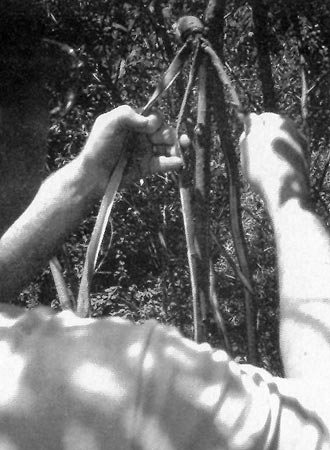
Photo 4
 |
Twist the first two pieces, continuing
all of the way down the pieces, before you twist the third piece.
Photo 4. This will make it easier to hold the first two pieces,
and twist the third piece. |
|
|
|
|
Photo 5
 |
As you can see in Photo 5,
keeping these three pieces tensioned can be a task. This can be
accomplished simply by using your left hand to hold the third piece.
(Note: If you pre-twist the pieces, it will speed up the process.) |
|
|
|
|
Photo 6
 |
Next, we will begin the crossover or
braiding. Photo 6. It will not matter if you start with the
right side or the left side, as long as you remember to keep the
tension in both sides equal (as described in the first article,
holding them approximately 45 degrees away from each other). I have
chosen to start by taking the left strip of bark, and bringing it
over the center strip. Then, 1 will take the right strip of bark and
bring it over the left strip of bark. |
|
|
|
|
This is not complicated if you have ever braided anything. Try following
this example, and then try some experimenting with each strand. Try it
several different ways. You will find that the process will take on its
own look. Try to get a feel for it, then make whatever changes that you
need. It does not really matter how it looks as long as it holds well,
and gives you the characteristics that you will need to use it for.
Remember to keep the tension equal. This will allow equal sharing of the
load on all sides of the cordage. |
|
|
|
Photo 7
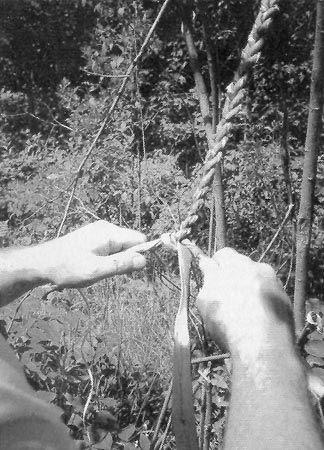 |
Make the length of the binding whatever
size you will need it to be. Then, simply tie one strip of bark to
the other. Photo 7. |
|
|
|
|
Photo 8
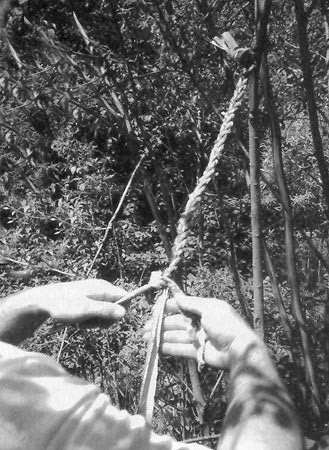 |
Snug up the knot, and tie up the other
two pieces using the same method. Photo 8. You do not have to
be too concerned with using the right knots. If it holds the end
tight, it will work fine. If you wish to trim the ends of the strips
of bark away at this point, keep in mind, that if a load is applied
to the binding, there will be some stretching. Always leave extra
bark at the bottom for movement. |
|
|
|
|
Photo 9
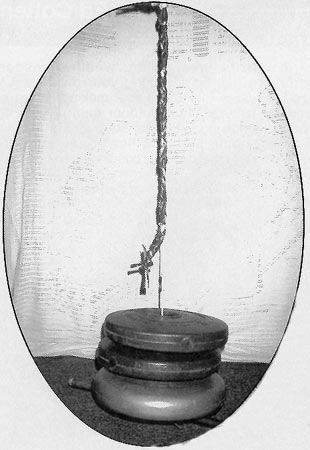 |
Next, you can test the binding using the
same experiment that was used in
Part I. Tie the binding to three 25-pound weights suspended
above the floor or ground. Photo 9. Leave it hanging for a
considerable amount of time before removing it to see how well it
will hold up. If a piece of binding can hold 75 pounds, it will be
very practical to use. |
|
|
|
|
Think of the many ways you can expand on this idea, and apply it using
your new skill. Instead of using three single pieces, take six double
pieces, and braid them together. How much will they hold? As you can now
see, there is no end to new ideas to this technique. |
|
|
|
Photo 10
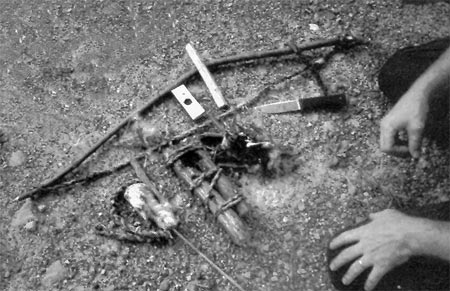 |
Another example is shown in Photo 10.
The string was taken off of a bow, and the same willow bark binding
technique was used. It makes a fine bowstring, with good abrasion
resistance properties. |
|
|
|
|
Go to
Part I |
|
|
Photographs and text on this page Copyright by Allan "Bow"
Beauchamp; used with permission of the author.
This article originally appeared in Wilderness Way magazine, Volume 6, issue
1 |
|
|
|
|

